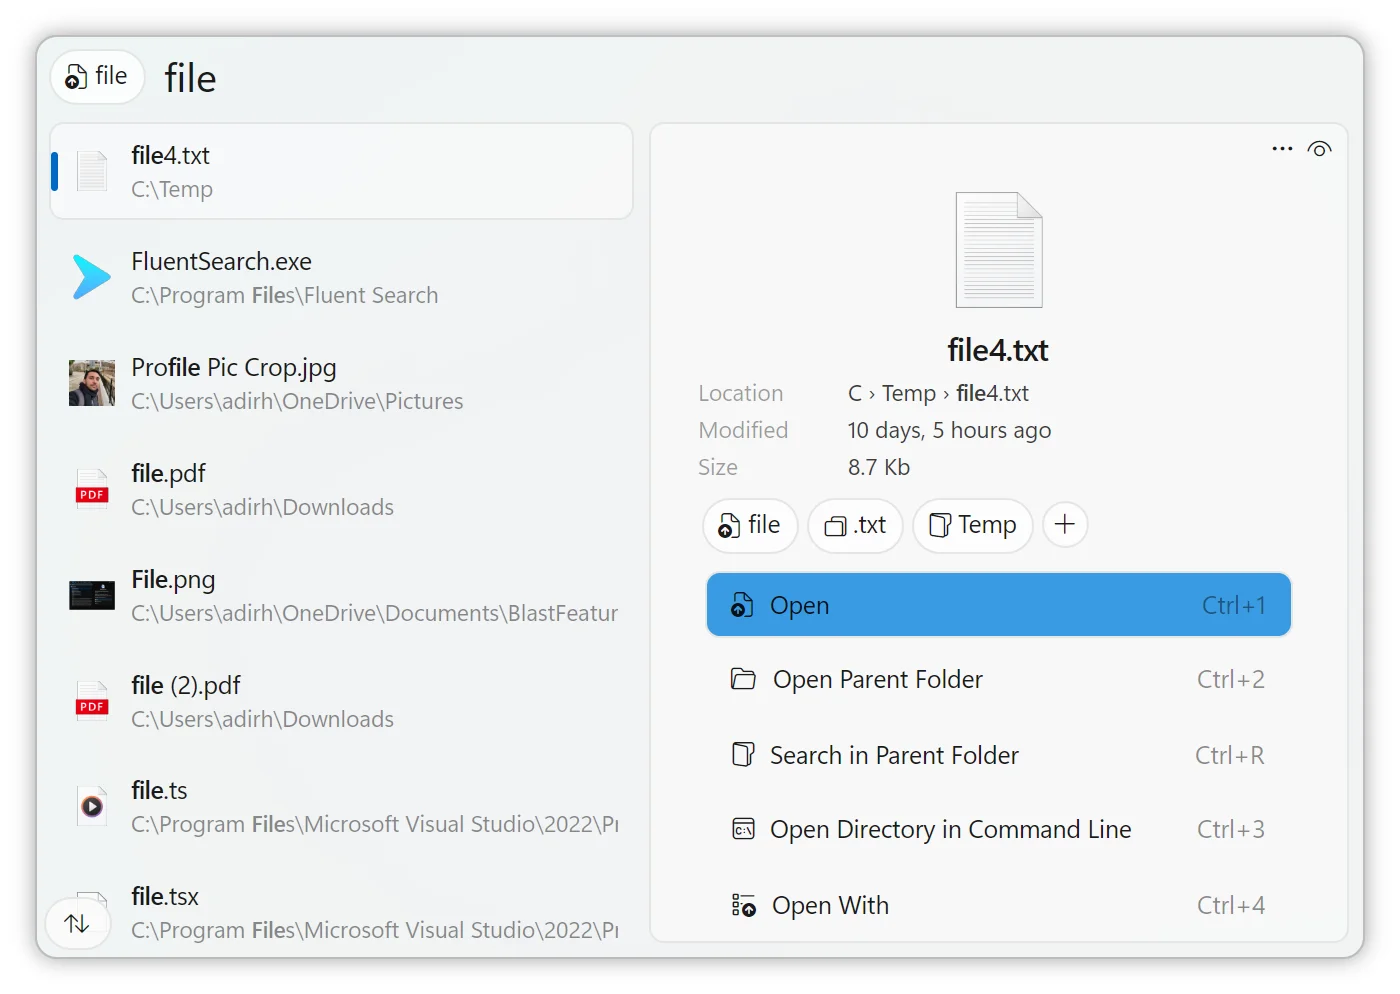
File Search in Fluent Search

Fluent Search offers a robust and efficient file search capability, enabling users to quickly locate files and directories on their system. This functionality is powered by an indexing system that supports multiple indexers, including its native indexer, Windows Search, and Everything. Understanding how these indexers work and how to configure them can enhance your search experience.
Indexing Mechanisms
Native File Indexer
Fluent Search includes a built-in file indexer designed for speed and minimal CPU usage. This native indexer scans your files and maintains an up-to-date index, allowing for rapid search results. To utilize the native file indexer:
- Install the Indexer Service:
- Navigate to
Settings>Files>File Indexer. - Select
Fluent Searchas your preferred indexer. - Follow the prompts to install and start the service.
- Navigate to
Note: Administrative privileges may be required to install the service.
Windows Search Indexer
Fluent Search can integrate with the Windows Search indexer, utilizing the existing Windows indexing service. This allows Fluent Search to access the same index used by Windows Search, providing consistent results across both search tools. To configure this:
Enable Windows Search Integration:
- Go to
Settings>Apps>Files>File Indexer. - Select
Windows Searchas the indexer.
- Go to
Configure Indexed Locations:
- Open
Control Panel>Indexing Options. - Modify the indexed locations to include directories you want to search.
- Open
Note: Disabling Windows Indexing may affect the functionality of Windows Search and other dependent features.
Everything Indexer
Fluent Search also supports integration with the Everything search engine by Voidtools, known for its rapid indexing and minimal resource usage. To use Everything as your indexer:
Install Everything:
- Download and install Everything.
Enable Everything Integration in Fluent Search:
- Navigate to
Settings>Files>File Indexer. - Select
Everythingas the indexer.
- Navigate to
Note: Ensure the Everything service is running for Fluent Search to access its index. If Everything client is running as admin, Fluent Search must run as admin as well.
Configuring Indexed and Ignored Paths
Customizing which directories are indexed or ignored can optimize search performance and relevance.
Adding Indexed Paths
Access File Indexer Settings:
- Go to
Settings>Apps>Files>Indexed Paths.
- Go to
Add New Paths:
- Click
Add Pathand select the directories you want to include in the index.
- Click
Ignoring Specific Paths
Access Ignored Paths Settings:
- Navigate to
Settings>Apps>Files>Ignored Paths.
- Navigate to
Add Paths to Ignore:
- Click
Add Pathand choose the directories or files you want to exclude from the index.
- Click
Note: Properly configuring ignored paths can prevent unnecessary files from appearing in search results and improve performance.
Troubleshooting Indexer Issues
If you encounter issues with the file indexer service:
Verify Service Installation:
- Open
Services(services.msc). - Locate
FluentSearch.FileIndexer. - Ensure the service is running. If not, start it manually.
- Open
Reinstall the Indexer Service:
- If problems persist, reinstall the service via
Settings>Apps>Files>File Indexer.
- If problems persist, reinstall the service via
For further assistance, refer to the Fluent Search GitHub Issues page or join the community on Discord.
By understanding and configuring these indexing options, you can tailor Fluent Search to efficiently locate the files and directories most relevant to your needs.